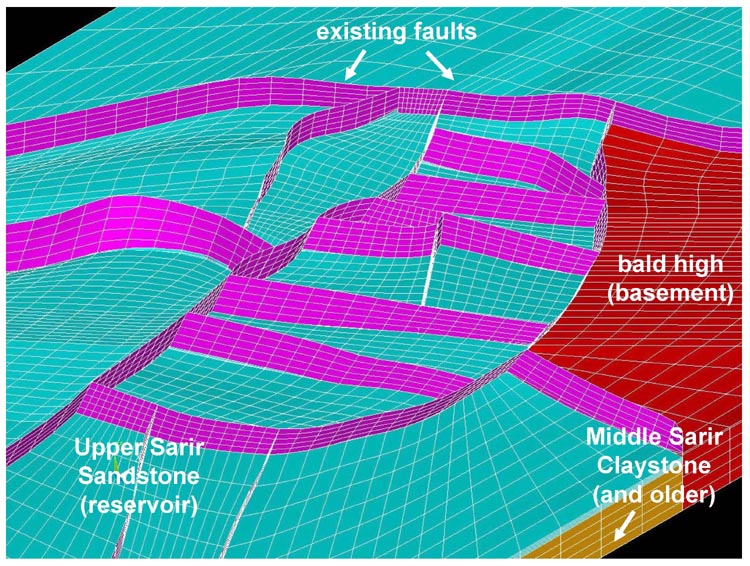
Figure 2. Detail of the reservoir model. Elements representing the Maragh Formation have been removed to visualize the fault pattern at
the reservoir level (Note: For reasons of confidentiality no scale and orientation are given).
Figure 2. Detail of the reservoir model. Elements representing the Maragh Formation have been removed to visualize the fault pattern at
the reservoir level (Note: For reasons of confidentiality no scale and orientation are given).